RetroArch keeps moving forward, being the reference frontend for libretro and all. Here comes version 1.3.6, and once again we have a lot to talk about.
Where to get it
Windows/Mac/iOS (build only)/Nintendo/PlayStation – Get it here.
Android: You can either get it from F-Droid or from Google Play Store.
Linux: Since RetroArch is included now on most mainline Linux distributions’ package management repository systems, we expect their versions to be updated to 1.3.6 shortly.
I will release versions for MacOSX PowerPC (10.5 Leopard) and 32-bit Intel MacOS X 10.6 (Snow Leopard) later on, maybe today or tomorrow.
Usability improvements
Windows Drag and Drop support
Courtesy of mudlord, with the Windows version, you can now drag and drop a ROM (or any other content) onto RetroArch’s window, and it will attempt to load the correct core for it. If there is more than one core available for the type of content you dragged and dropped, it will present you with a slidedown list of cores to select from.
Vastly improved content downloading features
Starting with v1.3.6, RetroArch users can download compatible freeware content, such as the shareware release of Doom, right from the app. This video goes through the steps, which include fetching the core from the online updater, fetching the content from the repository and then launching the core and content we just downloaded.
Menu customization and aesthetics – XMB and MaterialUI
RetroArch v1.3.6 adds support for a number of themes in the default mobile menu, including both bright and dark themes.
There’s also the ability now to set a custom wallpaper in XMB and be able to colorize it with a color gradient. To do this, you go to Settings -> Menu, you set a wallpaper, and from there you have to set ‘Menu Shader Pipeline’ to OFF. You can then choose from one of the color palettes in ‘Color Theme’ in order to shade the background wallpaper, or just select ‘Plain’ in case you don’t want to colorize it.
Undo Load/Save State
Have you ever gotten through a tough part of a game and wanted to make a savestate only to hit the “load state” button instead and have to do it all over again? Or maybe you were practicing a particularly difficult maneuver–for a speedrun, perhaps–and accidentally saved a bad run over your practice point because you hit “save state” instead of “load state”? While savestates are considered one of the great advantages to emulating retro games, they can also lead to these frustrating situations where they wipe out progress instead of saving it, all because of one slip of the finger. RetroArch now has the ability to undo a save- or load-state action through some automatic state-shuffling that happens behind the scenes, so you never have to worry about these situations again.
Undo Load State – Before the ‘current’ state is altered by e.g. a ‘Load Savestate’ operation, ‘current’ is saved in memory and ‘Undo Load State’ restores it; you can also undo this option by using it again, which will make you flip-flop between 2 states.
Undo Save State – If there was a savestate file that was overwritten, this option restores it.
New Features
The main event of RetroArch 1.3.6 is obviously the fact that it makes it possible to run the N64 Vulkan core, paraLLEl. Previous versions of RetroArch will not be able to run this because of the new extensions to libretro Vulkan which we had to push to make this renderer possible.
Vulkan
Async compute core support – ready for ParaLLEl
It was already possible to run Vulkan-enabled libretro cores, but with this release, a few crucial features have been added. Support for queue transfers was added and a context negotiation interface was added.
With this we can now use multiple queues to overlap compute and shading in the frontend level, i.e. asynchronous compute. ParaLLEl would certainly not have been as fast or as effective were it not for this.
ParaLLEl now joins triple-A games like Rise of the Tomb Raider and Doom in heavily relying on Vulkan’s async compute capabilities for maximum efficiency. A test core was also written as a proof of concept for this interface.
If you want to read more about ParaLLEl, we have a compendium blog post for you to digest here.
Supports Windows, Linux, Android equally well now
The previous version already had Vulkan support to varying degrees, but now we feel we are finally at the point where Vulkan driver support in RetroArch is very much mature across most of the supported platforms.
Vulkan should work now on Android, on Windows, and on Linux, provided your GPU has a working Vulkan driver.
On Linux we now support even more video driver context features, such as VK_KHR_display support. This is a platform-agnostic KMS-like backend for Vulkan, which should allow you to run RetroArch with Vulkan without the need of an X11 or Wayland server running.
On Windows and Android, we include Vulkan support now. Vulkan has been tested on Android with NVIDIA Shield Tablet/Console, and both work. Be aware that there are some minuscule things which might not work correctly yet with Vulkan on Android. For instance, orientation changing still doesn’t work. This will be investigated.
Max swapchain images – driving latency even lower with Vulkan and friends
RetroArch already has built up quite a reputation for itself for being able to drive latency down to very low levels. But with new technologies, there is always room for improvement.
Max amount of swapchain images has now been implemented for both the DRM/KMS context driver for OpenGL (usable on Linux) and Vulkan now. What this entails, is that you can programmatically tell your video card to provide you with either triple buffering (3), double buffering (2) or single buffering (1). The previous default with DRM/KMS was 3 (triple buffering), so setting it to 2 could potentially shave off latency by at least 1 frame (as was verified by others). Setting to 1 won’t often get you single buffering with most monitors and drivers due to tearing and they will fall-back to (2) double buffering.
With Vulkan, RetroArch can programmatically infer to the video card what kind of buffering method it likes to be able to use, a vast improvement over the nonexistent options that existed before with OpenGL (from a platform-agnostic perspective).
What Vulkan brings to the table on Android
Vulkan has been tested to run on Android devices that support Vulkan, like Shield Tablet/Console. Latency has always been very bad on Android in the past. With Vulkan, frame times are significantly lower than with OpenGL, and we no longer have to leave Threaded Video enabled by default. Instead, we can turn off Threaded Video and letting RetroArch monitor the refresh rate dynamically, which is the more desirable solution since it allows for less jittery screen updates.
Audio latency can also be driven down significantly now with Vulkan. The current default is 128ms, with Vulkan we can drive it down to 64 or even 32ms.
Couple this with the aforementioned swapchain images support and there are multiple ways to drive latency down on Android now.
OpenGL music visualizer (for FFmpeg-enabled builds)
Versions of RetroArch like the Linux and Windows port happen to feature built-in integrated FFmpeg support, which allows you to watch movies and listen to music from within the confines of RetroArch.
We have added a music visualizer now. The scene is drawn as a cylindrical mesh with FFT (Fast Fourier Transform) heightmap lookups. Different colors are shaded using mid/side channels as well as left/right information for height.
Note that this requires at least GLES3 support (which is available as well through an extension which most GPUs should support by now).
Improvements to cores
TyrQuake
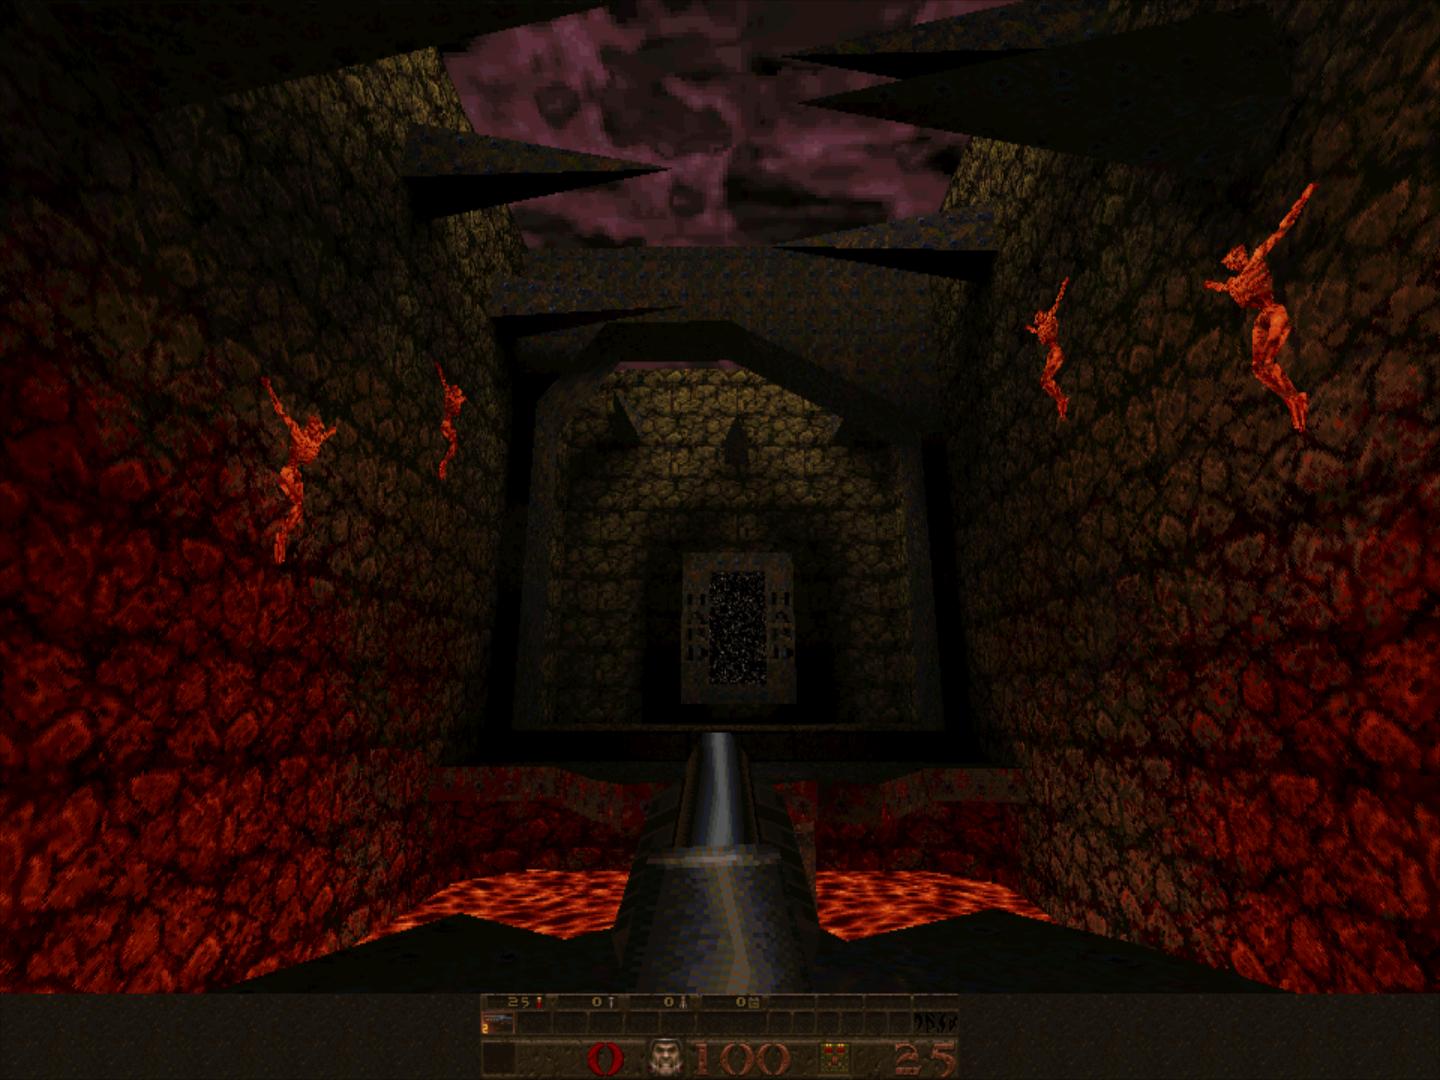
User leileilol contributed a very cool feature to TyrQuake, Quake 64-style RGB colored lighting, except done in software.
To be able to use this feature, you need to create a subdir in your Quake data directory called ‘maps’, and you need to move ‘.lit’ files to this directory. These are the lighting map files that the Tyrquake core will use in order to determine how light should be positioned.
From there on out, you load up the Tyrquake core, you go to Quick Menu -> Options, you enable Colored Lighting. Restart the core and if your files are placed correctly, you should now see the difference.
Be aware that in order to do this, the game renderer shifts to 24bit color RGB rendering, and this in turn makes things significantly slower, although it should still be fairly playable even at higher resolutions.
View the image gallery here.
To download this, go to ‘Add Content’ -> ‘Download Content’. Go to ‘Tyrquake’, and download ‘quake-colored-lighting-pack.zip’. This should extract this zip to your Downloads dir, and inside the Quake directory. From there, you can just load Quake and the colored lighting maps should be found providing the ‘Colored Lighting’ option has been enabled.
SNES9x emulator input lag reduction
A user on our forum, Brunnis, began some investigations into input latency and found that there were significant gains to be made in Super Nintendo emulators by rescheduling when input polling and video blitting are being performed. Based upon these findings and after some pull requests made to SNES9x, SNES9x Next, and FCEUmm, at least 1 to 2 frames of input lag should be shaved off now.
Do read this highly interesting forum thread that led to these improvements here.
News for iOS 10 beta users
There is now a separate version for iOS 10 users. Apple once again changed a lot of things which makes it even more difficult for us to distribute RetroArch the regular way.
Dynamic libraries cores cannot be opened from the Documents directory of the app anymore in iOS 10. They can be opened from the app bundle, as long as they are code-signed. This reverts back to the previous behavior of RetroArch, where the cores need to be in the modules directory of the app bundle.
Go to this directory:
https://github.com/libretro/RetroArch/tree/master/pkg/apple
and open RetroArch_iOS10.xcodeproj inside Xcode.
Note – you will need to manually compile the cores, sign them, and drag them over to the modules directory inside Xcode.
Example –
1. You’d download a core with libretro-super.
A quick example (type this inside the commandline)
git clone https://github.com/libretro/libretro-super.git
./libretro-fetch.sh 2048
./libretro-build.sh 2048
This will compile the 2048 core inside
2. Move the contents of this directory over to the ‘modules’ directory inside the RetroArch iOS 10 Xcode solution. It should presumably handle signing by itself.
Bugfixes/other miscellanous things
- Stability/memory leak fixes – We subjected RetroArch to numerous Valgrind/Coverity/Xcode Memory leak checks in order to fix a plethora of memory leaks that had reared their ugly heads inbetween releases. We pretty much eliminated all of them. Not a sexy feature to brag about, but it involved lots of sweat, tears and effort, and the ramifications it has on the overall stability of the program is considerable.
- There were some problems with Cg and GLSL shader selections which should now be taken care of.
- ScummVM games can now be scanned in various ways (courtesy of RobLoach)
- Downloading multiple updates at once could crash RetroArch – now fixed.
- Several cores have gotten Retro Achievements support now. The official list of systems that support achievements now is: Mega Drive, Nintendo 64, Super Nintendo, Game Boy, Game Boy Advance, Game Boy Color, NES, PC Engine, Sega CD, Sega 32X, and Sega Master System.
- You can now turn the supported extensions filter on or off from the file browser.
Effort to addressing user experience feedback
I think a couple of things should be addressed first and foremost. First, there is every intent to indeed make things like a WIMP (Windows Icons Mouse Pointers) interface around RetroArch. To this end, we are starting to make crossplatform UI widget toolkit code that will make it easy for us to target Qt/GTK/Win32 UI/Cocoa in one fell swoop.
We have also spent a lot of time plugging some of the rough edges around RetroArch and making the user interface more pleasurable to work with.
Youtube libretro channel
Hunterk/hizzlekizzle is going to be running the libretro Youtube channel from now on, and we’ll start putting up quick and direct Youtube videos there on how to be able to use RetroArch. It is our intent that this will do a couple of things:
1. Show people that RetroArch is easy to use and has numerous great features beneath the surface too.
2. It allows users to give constructive criticism and feedback on the UI operations they see and how they think they should be improved.
3. We hope to engage some seasoned C/C++ coders to help us get some of these UI elements done sooner rather than later. Most of RetroArch development mostly relies on a handful of guys – 5 at the most. It is a LOT of hard work for what amounts to a hobbyist project, and if we had a lot more developers seasoned in C/C++, stuff could be done quicker.
4. There is no intention at all to make RetroArch ‘obtuse’ for the sake of it, there is every intention to make it more accessible for people. Additional help would go a very long way towards that.
Regarding the current UIs and their direction, it is obviously meant to be a console-like UI experience. This might not be what desktop users are used to on their PCs but it is what we designed menu drivers like XMB to be. It is true that keyboard and mouse are mostly seen as afterthoughts in this UI but really, we wrote the UI with game consoles and something where a gamepad is the primary input device at all times, particularly since a keyboard to us is a poor way of playing these console-based games anyway.
Anyway, menu drivers like XMB and MaterialUI will never have any WIMP UI elements. HOWEVER, in upcoming versions, we will be able to flesh out the menubar and to allow for more basic WIMP UI elements.
RetroArch is meant to be a cutting-edge program that is ultra-powerful in terms of features. With that comes a bit of added complexity. However, we have every intent of making things easier, and with every release we put a lot of time and effort into improving things. But again, more developers would help out a substantial lot in speeding up certain parts that we are working on.
Our vision for the project involves an enormous workload and we’re considering differnt ways of generating additional support. If a Patreon might allow us to get more developers and get more stuff done faster, we might consider it. But we want such things to be carefully deliberated by both our internal development staff and the users at large. I hope you’ll be able to appreciate the relative rough edges around the program and appreciate the scope and the craft we have poured into the program. Please appreciate that we are pouring a lot of blood, sweat and tears into the program and that mostly we try to maintain an upper stiff chin when faced with all the criticism, but we do care and we do intend to do better. Volunteer coders are very welcome though, by people who have some time to spare and who want to make a difference. We ask for your understanding here, and we hope that by finally speaking out on this, users can gain a better understanding of our intent and be able to appreciate the program better in light of that.


