Written by J.D. G. Leaver
Gambatte Updates
Palette Additions
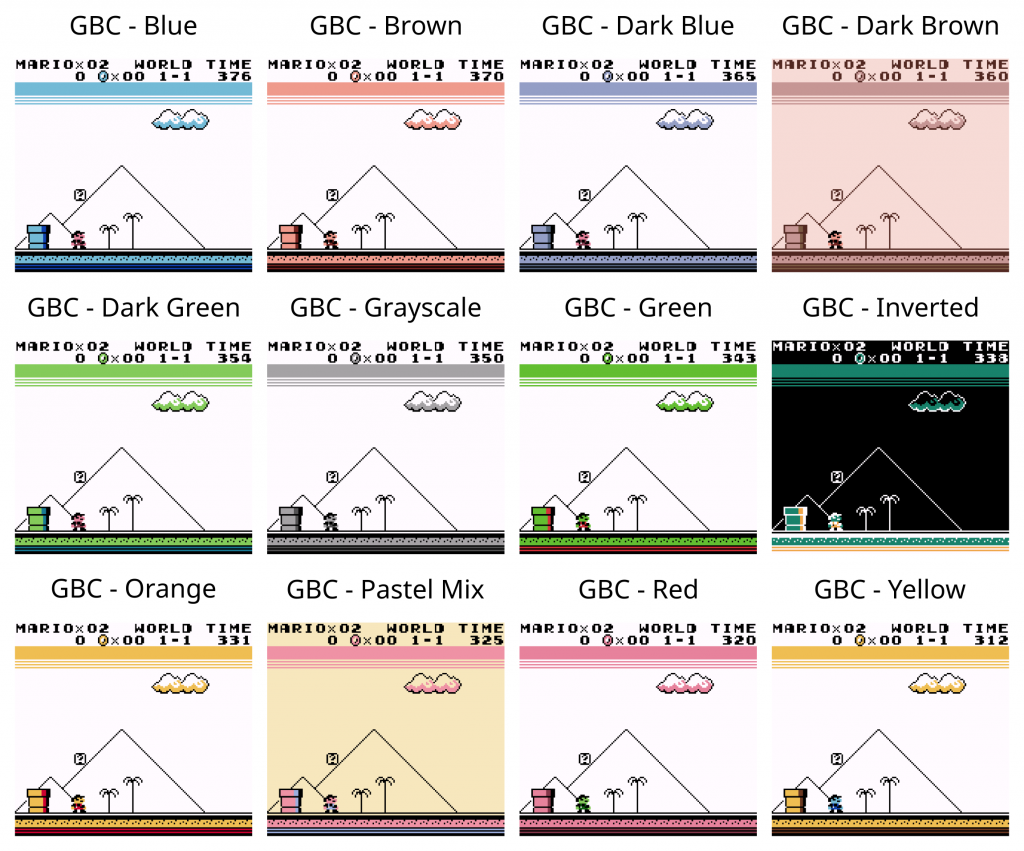
The Gambatte core has long been able to colourise greyscale Game Boy games using the default built-in palettes of the Game Boy Color:
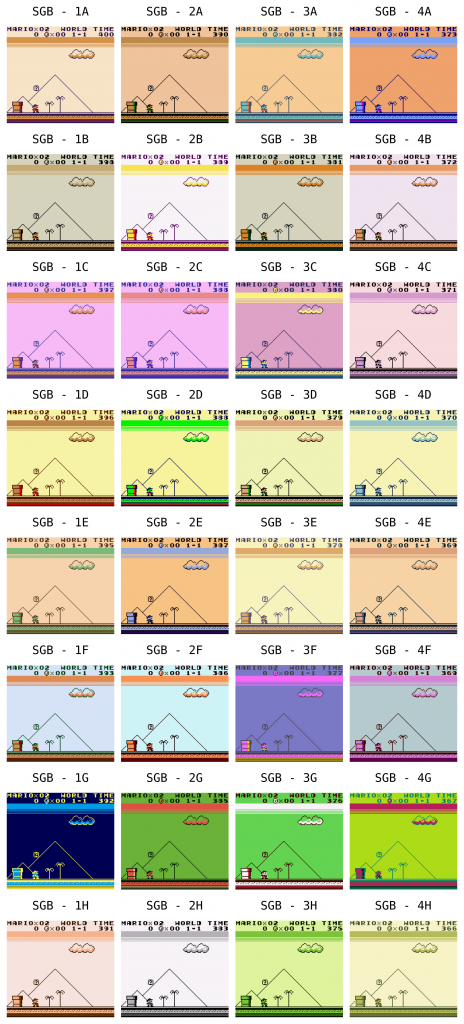
Thanks to the assimilation of original work by [TRIFORCE89](https://github.com/TRIFORCE89/Gambatte-Core), we now also have access to the 32 default palettes of the Super Game Boy:
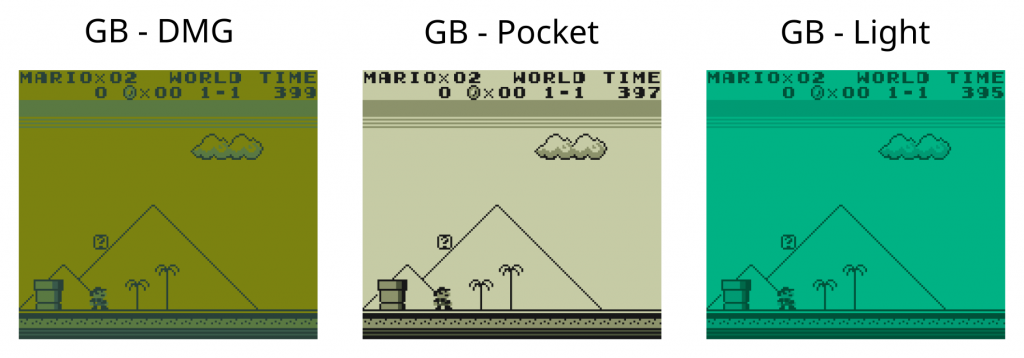
To complete the set, three additional palettes have been created to simulate the display characteristics of the various Game Boy hardware revisions: DMG, Pocket and Light. You want pea soup green? You got it!
All available palettes may be cycled via the usual ‘Internal Palette’ core option. Better still, the automatic Game Boy colorisation setting has been updated to automagically select the ‘best’ (most colourful/appropriate) palette for each game, using an internal database with the following order of preference:
1. Game-specific Super Game Boy palette, if defined and more colorful than game-specific Game Boy Color palette.
2. Game-specific Game Boy Color palette, if defined.
3. Game-specific Super Game Boy palette, if defined.
4. Palette specified by ‘Internal Palette’ core option.
(Of course, automatic selection may be overridden to force the use of either Game Boy Color or Super Game Boy palettes, or any specific palette that is desired)
Colour Correction Improvements
Game Boy Color games are designed to be viewed on a dim, low contrast LCD panel. Transfer these games to a modern high quality display and a proliferation of over-saturated colours will assault your eyeballs.
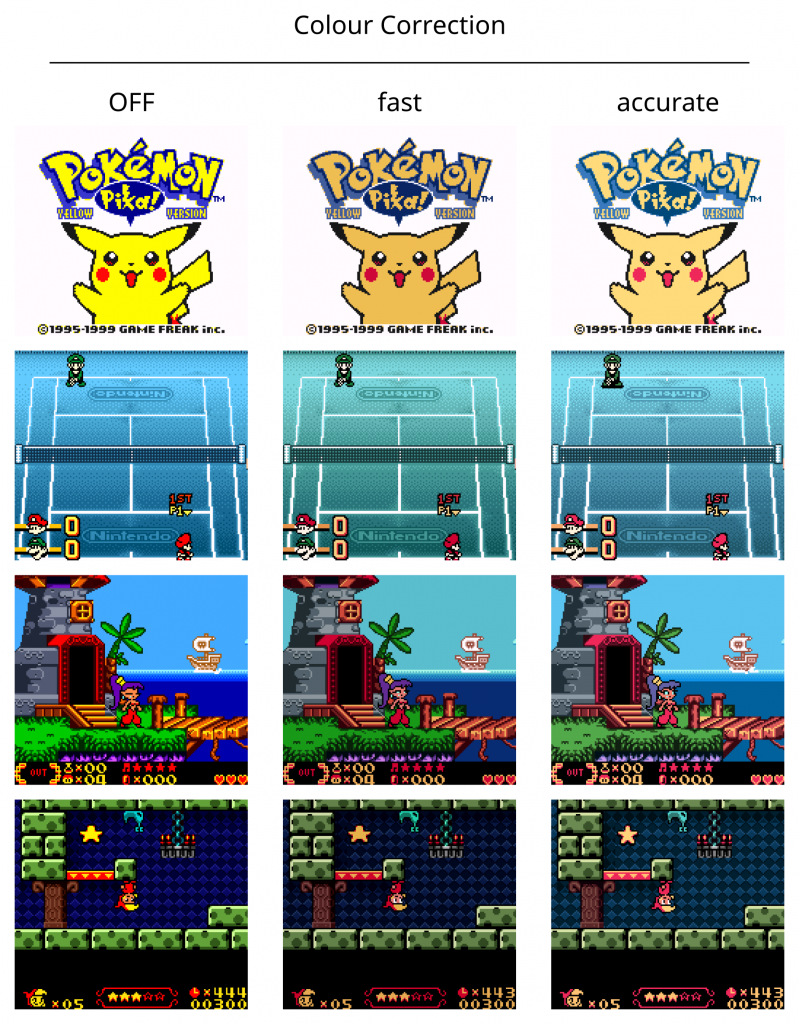
The Gambatte core has a long standing ‘Color correction’ option which tries to improve the generated image. This works after a fashion, but it tends to make everything too dark and has some unpleasant colour mangling side effects (e.g. it give Pikachu an orange perma-tan). Fortunately, the mighty Pokefan531 (https://forums.libretro.com/t/real-gba-and-ds-phat-colors/1540/159) provides a much better solution via an external gbc-color shader (https://github.com/libretro/glsl-shaders/blob/master/handheld/gbc-color.glslp). Now this same functionality has been added to the core itself.
Setting the new ‘Color correction mode’ core option to ‘accurate’ enables the Pokefan531 ‘gold standard’ colour correction method. The old Gambatte default can still be used by setting the mode to ‘fast’ (this slightly reduces CPU load and so may be useful on garbage-tier hardware – although the ‘accurate’ method is confirmed to run at full speed even on an o3DS). Here are some screenshots showing the difference in output image quality:
Care has also been taken to ensure that colour correction is only applied when appropriate. The new Super Game Boy and hardware-mimicking GB DMG/Pocket/Light palettes are intended for display on a standard television, *not* on a Game Boy Color LCD panel, and attempting to ‘correct’ them is a mistake. The ‘Color correction’ core option is therefore no longer a simple toggle: it may now be set to ‘GBC only’, which disables correction unless explicitly running a Game Boy Color game or using a Game Boy Color palette. (Of course, if you *want* broken Super Game Boy palettes, you can change the setting to ‘always’…)
These updates, along with the improvements to automatic colourisation, should make the core much easier to work with. Instead of generating core/shader overrides to deal with some games running in colour, and some not, you can now essentially set the following:
– GB Colorization: auto
– Internal Palette: GB – DMG/Pocket (or whatever)
– Color correction: GBC only
– Color correction mode: accurate
– Emulated hardware (restart): Auto
…and pretty much every game will look correct.
Dark Filter (a.k.a. Eye Saver Mode)
In addition to having over-saturated colours, it is not uncommon for games targeting early non-backlit handheld systems to make use of white backgrounds. While these look fine on original hardware, they are simply too bright when viewed on a modern backlit display. Staring at a strong blue-spectrum backlight is a recognised cause of asthenopic symptoms. These games are a health hazard!
On most platforms, this can be mitigated easily and effectively by the use of an appropriate LCD shader. Indeed, the simpletex_lcd shader (https://github.com/libretro/glsl-shaders/blob/master/handheld/simpletex_lcd.glslp) was written for this express purpose:
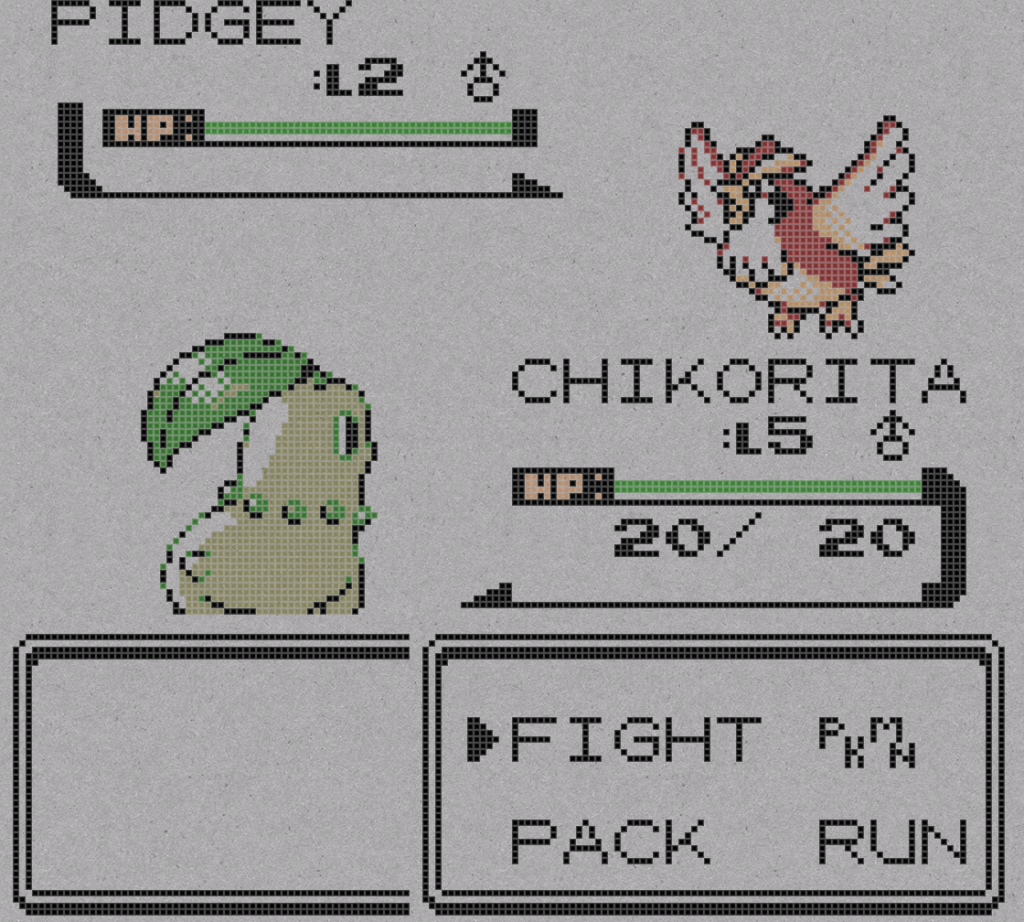
Unfortunately, shaders are not always an option: weak hardware may not be able to run them at full speed, and devices like the 3DS have no shader support whatsoever…
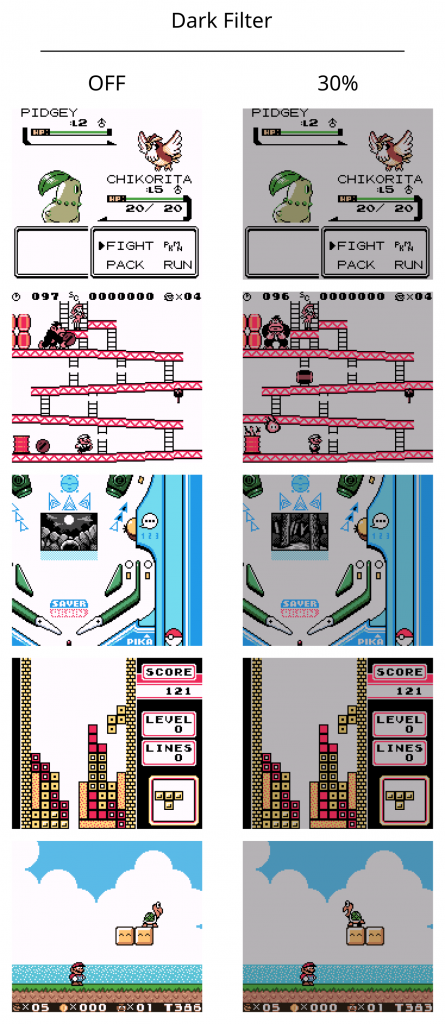
A more inclusive solution has therefore been added to the Gambatte core in the form of an adjustable ‘dark filter’. This is somewhat analogous to the filtering used in Nintendo Virtual Console titles, only less awful. Instead of a uniform brightness reduction, the ‘darkening’ is roughly proportional to pixel luminosity; this gets rid of harsh glare without (completely) butchering image quality.
The filter may be enabled by setting the new ‘Dark Filter Level’ core option from 5-50%. Here are some screenshots showing the effect at 30%:
Give it a try – your eyes will thank you!

