Ever since the announcement earlier on June 30th, we have been working hard on the RetroArch Disc Project, and we are now getting to the stage where we want users to start alpha testing the latest code.
We invite you to come over to our Discord channel (also linked to on the RetroArch website – click on the tab ‘Discord’)- and join the channel #discordproject.
How to apply for alpha testing
For the purpose of this alpha test, we need you to meet the following requirements:
- You are using the latest nightly versions of RetroArch (available here).
- You are using RetroArch on PC, and are running either Linux or Windows with the CDROM support included.
- Make sure the cores you are going to be testing are the latest up-to-date versions. Update them daily from the Core Updater if unsure – the cores should have physical CDROM support, otherwise the testing won’t work.
- You have an optical disc drive (either USB or internal, any CD-ROM/DVD-ROM/BD-ROM drive should do).
Report issues you’re having with physical CDROM playback. Be as detailed as possible in your feedback – we are especially interested in which optical disc drive you’re using.
Be prepared that you might be asked by a moderator to run ‘retroarch_debug.exe’ and return a log message back to us in order to learn more about the issues you’re having. ‘retroarch_debug.exe’ is a debug executable that should be shipped with every RetroArch nightly version for Windows. For Linux users, we assume that they can build from source and compile with CDROM_DEBUG=1 manually in order to run these more detailed debug tests.
Compatible cores
Listed below are some of the cores that we added physical CD-ROM support to, and the ones that we would like you to test –
- Beetle PSX (HW and non-HW)
- Beetle Saturn
- Genesis Plus GX
- 4DO
- Redbook Audio Player (Audio CD core)
We have also added support to more cores, but for now we want to go with these cores as they have been most extensively tested.
A couple of known edge cases:
- Beetle PSX HW: The ‘vulkan’ renderer can exhibit issues where either the CD will not work, or some other corruption issue will manifest itself. We recommend you use ‘opengl’ or ‘software’ for now while you test CDROM.
- Beetle PSX HW: Make sure the core option ‘CD Access Method’ is not set to ‘precache’. If you do, real discs won’t work.
How to load discs
1.You need to first start up the core itself (there is no automatic system detection yet when you insert a disc).
Go to Load Core, and select the core you want to use.
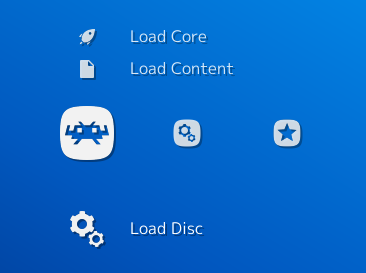
2. Once the core is loaded, select ‘Load Disc’.
 3. It will now list all optical drives. Make sure the disc you want to use has been inserted into the optical drive tray and make sure the tray is closed. Then select the drive. The core will now start with your CDROM as input.
How to dump discs
RetroArch can dump discs to internal storage in bin/cue format. The video above will show you how.
- Select ‘Dump Disc’.
- It will now list all optical drives. Make sure the disc you want to use has been inserted into the optical drive tray and make sure the tray is closed. Then select the drive.
The disc will now be dumped to the ‘Downloads’ directory. It will continue showing the progress bar until the operation has finished. In the meantime, you can play any core/game (as long as it doesn’t involve real CD playback) until the dumping has finished.
Redbook Audio Player – Libretro core for music CD playback!
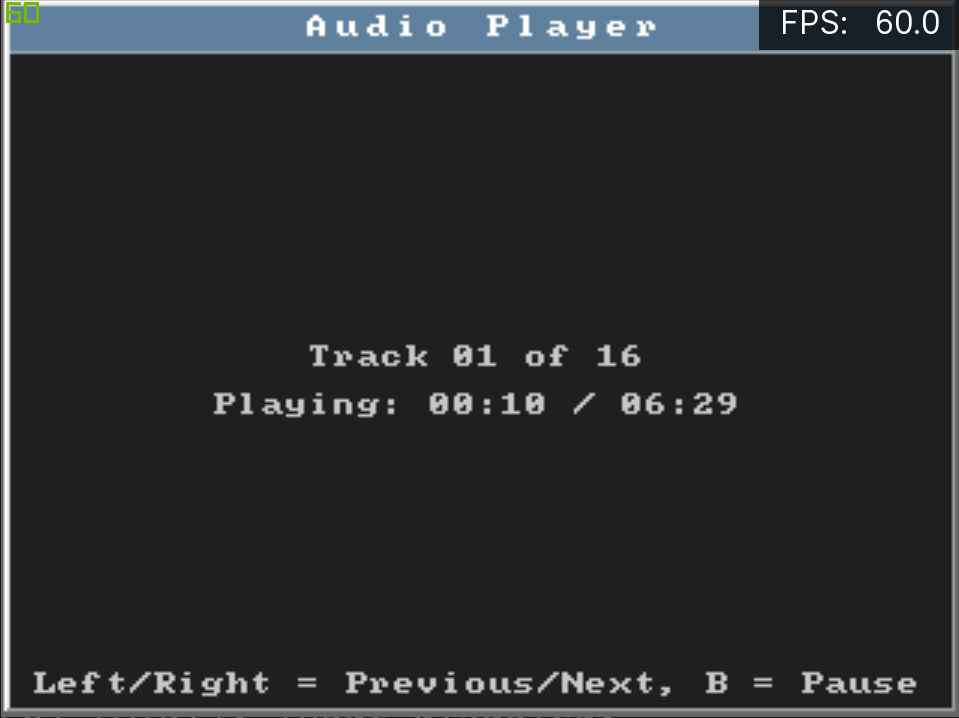

As a testbed for the Disc Project, we made a redbook audio CD player Libretro core!
You can grab this core for Windows and/or Linux by going to Online Updater, and downloading it from the list (Redbook Audio Player).
Known potential issues
- Right now, CDROM works better on Linux vs. Windows.
- FMV playback with Beetle PSX HW has the potential to be slow on some optical disc drives on Windows. Cause yet unconfirmed.
- There is a known issue with redbook audio – the redbook audio track begins a few seconds later from its starting period.
- Libcrypt copy-protected PlayStation1 games will not work right now, but any other copy-protected PlayStation1 disc should.
Here is a listing of some Libcrypt-protected games from Europe: https://hastebin.com/ruyacahuba.http . You can generally assume these won’t work.

